






How to use stainless steel expansion bolts
If you have ever tried to mount a heavy bracket on a concrete wall and watched the fastener spin uselessly in the hole, you know the frustration of using the wrong anchor. Stainless steel expansion bolts are purpose-built to solve that problem — but they only work if you install them correctly. If you are new to these fasteners, you probably have three big concerns. First, what size hole do I need to drill, and what happens if I get it wrong? Second, how tight should I make the nut — too loose and the anchor won't grip, too tight and I risk snapping the bolt? Third, will these bolts hold the weight I need them to hold, especially in outdoor or damp conditions? These are smart questions, and we are here to give you clear, practical answers. In this guide, we will walk through everything you need to know about stainless steel expansion bolts — from choosing the right size and drilling accurate pilot holes to tightening with the correct torque and avoiding installation pitfalls. We will cover the specific advantages of stainless steel over carbon steel for outdoor applications, the tools you will need, and the practical load capacities you can expect. For example, an M10 expansion bolt properly installed in concrete delivers a tensile load capacity of approximately 320 kg . Understanding these real-world numbers helps you match the right fastener to your project. By the time you finish reading, you will have the confidence to install stainless steel expansion bolts like a professional.
What are stainless steel expansion bolts and how do they work?
Before we get into installation, let us take a moment to understand what these fasteners actually are and why they work so well.

The components and working principle
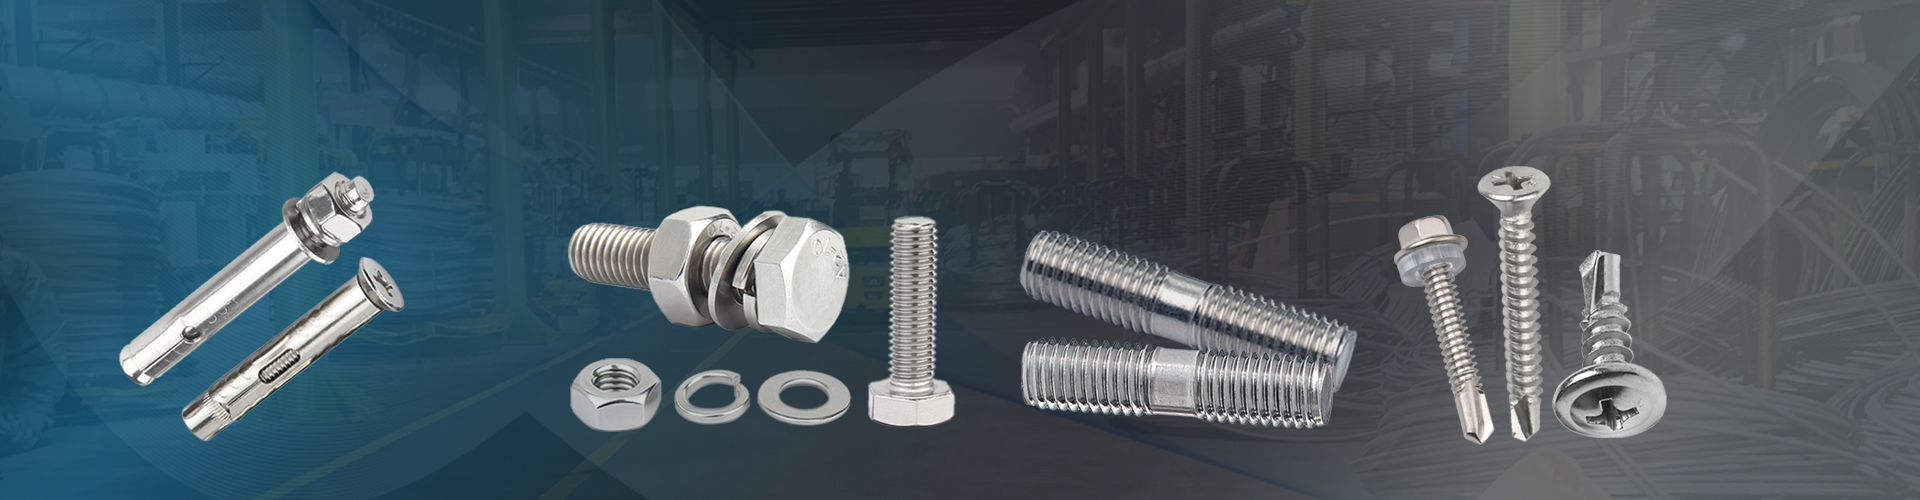
An expansion bolt is an assembly of three components: a threaded bolt, a nut, and an expanding sleeve. When you tighten the nut, the bolt is drawn upward, pulling a tapered cone into the sleeve. This forces the sleeve to expand outward against the walls of the drilled hole . The result is a combination of friction and mechanical interlock that grips the surrounding concrete, brick, or masonry with remarkable strength.
The expansion mechanism is brilliantly simple: the harder you tighten, the more the sleeve expands and the more secure the anchor becomes . This is why expansion bolts work so well in materials where you cannot cut traditional threads — they essentially create their own grip by displacing and gripping the surrounding material.
Why choose stainless steel over carbon steel?
The material choice matters enormously for long-term performance. Stainless steel expansion bolts contain sufficient chromium to form a passive chromium oxide layer that blocks corrosion from spreading into the metal's internal structure . Carbon steel, by contrast, will rust when exposed to air and moisture, and that rust actively accelerates further corrosion .
For outdoor use, wet environments, or coastal areas, stainless steel expansion bolts are the clear choice. Common grades include 304 stainless steel for general corrosion resistance and 316 stainless steel for maximum protection against saltwater and chemical exposure . While stainless steel costs more than carbon steel upfront, the longevity it provides in harsh conditions makes it more economical over the full life of a project.
Step-by-step installation guide
Now let us get into the actual process. Follow these steps carefully, and you will achieve a secure, lasting installation.
Step 1: Select the correct size and drill bit
The most critical factor in a successful installation is using the right size hole. If the hole is too large, the sleeve will not grip properly. If it is too small, you risk damaging the anchor or the drill bit. Always check the manufacturer's specifications — the correct drill bit diameter is usually printed on the packaging .
Here is a quick reference table for common sizes:
|
Anchor Size |
Recommended Drill Bit Diameter |
Minimum Hole Depth |
Typical Tensile Load (Concrete) |
|---|---|---|---|
|
M6 |
8 – 10 mm |
35 – 40 mm |
Approx. 120 kg |
|
M8 |
10 – 12 mm |
45 – 55 mm |
Approx. 170 kg |
|
M10 |
14 mm |
55 – 65 mm |
Approx. 320 kg |
|
M12 |
16 – 18 mm |
65 – 80 mm |
Approx. 510 kg |
|
M16 |
20 – 22 mm |
80 – 100 mm |
Approx. 800 kg (estimate) |
Important: The hole depth must be at least as deep as the full embedment length of the expansion sleeve. If the hole is too shallow, the sleeve will not expand fully and the anchor will not hold.
Step 2: Mark and drill the hole
Start by marking the exact location where you need the anchor. If you are mounting a heavy object, mark all holes at one time to ensure they align correctly. Use a hammer drill with a masonry bit — standard twist drills will not cut it in concrete. Drill straight into the material, keeping the drill perpendicular to the surface. A useful trick: wrap a piece of tape around the drill bit at the required depth so you know exactly when to stop.
After drilling, clean the hole thoroughly. Concrete dust inside the hole will prevent the sleeve from expanding properly and will reduce the holding strength significantly. Use a vacuum cleaner, compressed air, or a small brush to remove all debris .
Step 3: Insert the expansion bolt assembly
Insert the complete expansion bolt assembly — bolt, sleeve, and nut — into the hole. Leave the nut lightly threaded onto the bolt to prevent the bolt from falling into the hole during insertion . Gently tap the anchor with a hammer until it is fully seated and the sleeve is flush with or below the surface. Ensure the bolt's threads are fully accessible above the surface so you can attach the object you are mounting.
Step 4: Tighten the nut — the critical step
This is where the expansion actually happens. Use a wrench to tighten the nut. As you turn it, the tapered cone is drawn into the sleeve, forcing it to expand against the hole walls . The recommended installation torque varies by size — for example, a high-performance M10 stainless steel expansion bolt may require approximately 35 Nm . If you do not have torque specifications, tighten until you feel strong resistance — the point where the sleeve has fully expanded — then stop. Over-tightening can snap the bolt, and that is extremely difficult to repair.
Pro tip: Tighten the nut for 2 to 3 turns, then check that the anchor feels tight without any looseness before attaching your fixture . For stainless steel expansion bolts, be aware of galling risk — the threads can seize if tightened too quickly. Slower tightening helps prevent this.
Practical tips and common mistakes to avoid
Let us cover some real-world advice that can save you from costly errors.
Choosing between 304 and 316 stainless steel
For most general outdoor applications, 304 stainless steel offers excellent corrosion resistance at a reasonable cost. However, if you are installing near the coast, in marine environments, or where deicing salts are used, choose 316 stainless steel — the molybdenum in 316 provides superior protection against chloride corrosion . For water heater installations or damp basements, either grade works, but 316 gives you extra peace of mind.
Special considerations for different base materials
The holding strength of stainless steel expansion bolts varies significantly depending on what you are anchoring into. In solid concrete, an M10 bolt can hold approximately 320 kg in tension . In brick, the tensile capacity drops to roughly one-fifth of that — about 64 kg for the same bolt . For maximum holding power, always place the bolt in the solid portion of a brick or block rather than in mortar joints.
Proper spacing and edge distance
When installing multiple anchors, maintain adequate spacing between them. As a general rule, minimum spacing should be about 10 times the anchor diameter, and minimum edge distance should be about 5 times the anchor diameter to prevent concrete blowout . For safety-critical applications, follow engineering specifications and local building codes.
Removing rusted or stuck expansion bolts
Expansion bolts are designed as permanent fasteners, but if you do need to remove a rusted one, avoid brute force. Start by gently tapping the wrench handle with a hammer — the vibration can break the bond of rust between the threads . For severely seized bolts, apply heat with a torch to expand the metal, then immediately apply lubricating oil. The rapid cooling will help the oil penetrate the threads, making removal easier .
Contact Us
Not sure which stainless steel expansion bolt fits your specific application? Our team works closely with leading expansion bolt manufacturers and stainless steel expansion screw manufacturers to source high-quality anchors for every condition. Whether you need stainless steel expansion bolt prices for a commercial project or guidance on the right size for a home installation, we are here to help. Reach out today for a consultation or a quote tailored to your needs.
FAQ
Q1: What size drill bit should I use for an M10 stainless steel expansion bolt?
An M10 expansion bolt typically requires a 14 mm drill bit for the pilot hole . Always verify the manufacturer's recommendation, as the exact size can vary slightly between brands. The drill depth should be at least 55-65 mm to ensure full embedment of the expansion sleeve.
Q2: Can stainless steel expansion bolts be used in brick or block masonry?
Yes, but the holding strength is significantly lower than in solid concrete — approximately one-fifth of the concrete tensile capacity . For best results, install the bolt in the solid portion of the brick rather than in mortar joints. For heavy loads, consider using a different anchoring system or consult an engineer.
Q3: What is the difference between 304 and 316 stainless steel expansion bolts?
304 stainless steel offers excellent corrosion resistance for most general outdoor applications. 316 stainless steel adds molybdenum to the alloy, providing superior protection against chloride corrosion from saltwater and deicing chemicals . Choose 316 for coastal areas, marine environments, or any location where salt exposure is a concern.